Renaming photos on your iPhone has never been easier, thanks to the iPhone’s simple drag-and-drop photo renamer.
The default photo naming convention on your iPhone is not very descriptive, so if you want to put more context into the name of each photo, this article will show you how. Along with organizing your photos, you can now easily create an AI picture generator from text to transform simple descriptions into stunning visuals with just a few clicks.
How to rename photos on iphone
Open the Photos app and select the photo you want to rename. You’ll notice that on your iPhone, photos are saved with a default name of “IMG_NUMBER.JPG.”
For example, if you have a photo named “IMG_0001.jpg,” the next photo you import will be named “IMG_0002.jpg” and so on. It’s only natural to want to rename your photos with something more descriptive, but doing so can be a hassle, especially if you have thousands of photos in your iPhone.
Fortunately, renaming your photos is simple with the drag-and-drop photo renamer on your iPhone.
To rename a photo, simply follow these steps:
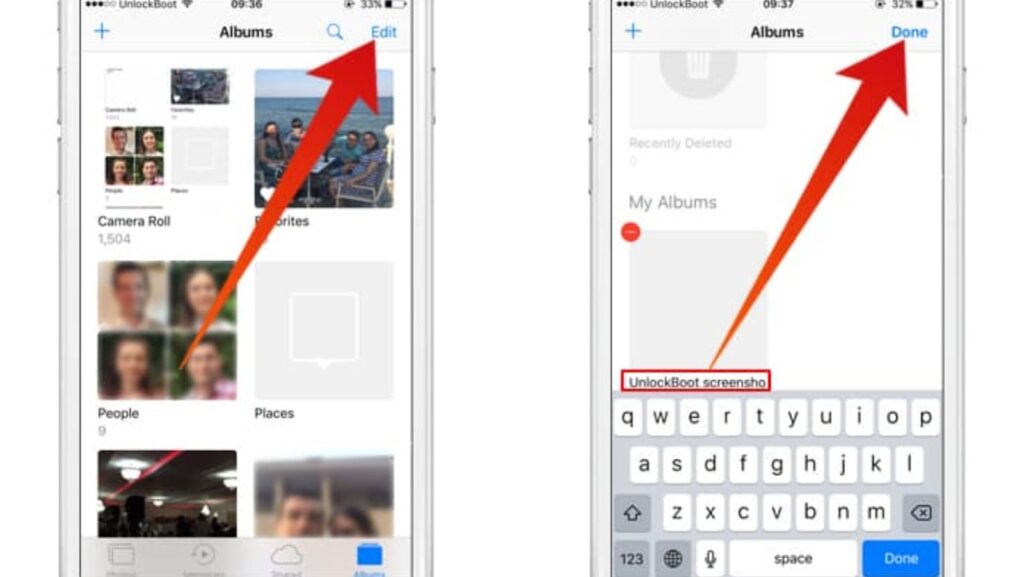
1) First, open the Photos app and find the photo you want to rename. On iPad or iPod touch, tap on the “Photos” app to open it, then tap on the “Camera Roll” or “My Photo Stream” albums. On iPhone 6s or earlier, you need to use an old-fashioned finger press (press down with one finger while tapping with another) to select a photo; newer models can use 3D Touch by pressing down hard on the screen while in the Photos app.
2) After selecting a photo, tap on “Edit” in the upper-right corner of your screen. Tap on the words “Name” above the keyboard to enter a new name for this photo. Now, simply type whatever you want here and touch done when finished.
3) You’ll notice that after changing the name to whatever you want, the date under the photo has also been changed. Since renaming photos is so easy on your iPhone, it can be a good idea to rename all of your photos with plain text descriptions. For example, if you are planning on uploading these photos to Facebook or Twitter, typing something like “Lake Powell Vacation – 2016” is a good way to organize your photos.
4) After renaming your photos, you can re-arrange them by tapping on the “Albums” button at the bottom of your screen. From here, tap on any album to show its contents. If you have multiple albums arranged in different folders (like one for people and another for places), simply swipe left or right to switch between them.
Once in an album, simply press down hard on your iPhone’s screen with one finger to select multiple photos at once. You can then re-arrange or delete these photos as you see fit. Just make sure that after deleting the name of a photo is “Not Set.” If it’s set to something else, you won’t be able to delete it.
For example, if you have a photo named “IMG_0001.jpg” and rename it to “First Picture – 2016”, the name of this photo will now be “Not Set.” If you press on the name of this photo, it won’t give you any options other than renaming or sharing. When your iPhone’s photo library is full of photos with descriptive names, you can find any image by simply typing keywords in the search box at the top of the screen. This makes it easy to find photos from various people or places without having to re-arrange them manually.
As long as your Apple smartphone runs on iOS 8 or later, renaming your photos on iPhone couldn’t be easier.
Don’t forget that you can also re-arrange your photos by tapping on the “Albums” button in the Photos app, then selecting an album to manage. Since you can use drag-and-drop on your iPhone, reordering a photo is as easy as dragging it from one album to another.