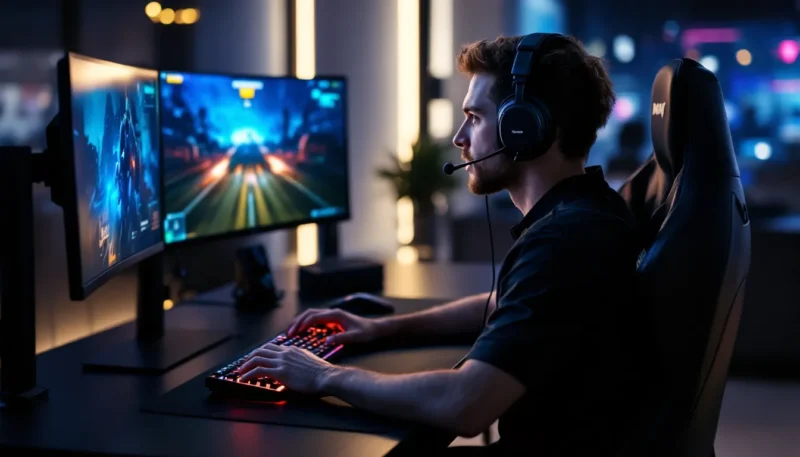
Few moments in Warzone feel as satisfying as landing a one-tap headshot from 200 meters out. The kill feed lights up with your name, and your target drops before they even know what hit them. But pulling off consistent one-shot eliminations isn’t just about pointing and clicking, it’s about understanding damage mechanics, building the right loadout, and mastering positioning in a battle royale that punishes sloppy plays.
In 2026, Warzone‘s sniper meta has evolved considerably. With recent balance updates adjusting headshot multipliers and the introduction of new weapons across various seasons, knowing which rifles still pack that instant-elimination punch is critical. Whether you’re holding down a rooftop in Urzikstan or rotating through Al Mazrah, the ability to secure one-shot kills separates average snipers from the players who control entire lobbies.
This guide breaks down everything needed to dominate with one-shot snipers: the mechanics behind instant eliminations, the current top-tier weapons, optimized loadouts, positioning strategies, and techniques to sharpen accuracy. Let’s immerse.
Key Takeaways
- Landing one-shot sniper eliminations requires understanding damage mechanics, headshot multipliers, and how to build the right loadout for your engagement distance.
- The FJX Imperium and MCPR-300 dominate the sniper meta in Season 2 Reloaded 2026, with the FJX delivering reliable one-shot kills out to 115+ meters against fully plated opponents.
- Smart positioning on high ground with multiple escape routes and rotations separates skilled snipers from average players, as static positions are quickly countered by coordinated teams.
- Master bullet drop and leading moving targets through dedicated practice and sensitivity optimization—muscle memory and follow-through techniques improve accuracy far more than raw aim alone.
- Avoid staying in one spot too long, over-committing to kills, and fighting from disadvantaged positions; always maintain full armor plates and use smoke grenades to counter enemy snipers effectively.
- Pair your sniper with a close-range secondary weapon like the Lachmann Sub or ISO Hemlock to cover vulnerabilities in urban fights where bolt-action snipers struggle.
What Makes a Sniper Rifle One Shot in Warzone?
Understanding what enables a sniper to achieve one-shot kills is fundamental. It’s not just about raw damage, several interconnected mechanics determine whether your shot eliminates an opponent instantly or leaves them crawling for cover.
Damage Profiles and Headshot Multipliers
Every sniper rifle in Warzone has a base damage value and specific multipliers for different body parts. Headshot multipliers are the critical factor for one-shot potential. Most heavy sniper rifles feature multipliers ranging from 2.5x to 3.5x on headshots, meaning a weapon dealing 150 base damage could inflict 375-525 damage to the head.
For reference, a fully plated enemy in Warzone has 250 total health (100 base health + 150 armor from three plates). To achieve a one-shot kill through full armor, a sniper needs to deal at least 250 damage with a single headshot. This is why weapons like the MCPR-300 and FJX Imperium dominate, they consistently break this threshold at range.
Damage falloff also plays a role. Some snipers maintain their one-shot capability out to 100+ meters, while others see damage reduction beyond 50-75 meters. Barrel attachments and ammunition types directly impact these ranges, which we’ll cover in the loadout section.
Armor Plates and TTK Considerations
While headshot damage determines one-shot potential, understanding your opponent’s armor state matters tactically. In the early game or after firefights, many players are running with two plates or fewer. This opens up body shot elimination opportunities with some marksman rifles that wouldn’t normally secure kills against full armor.
The time-to-kill (TTK) for snipers is theoretically zero on successful headshots, instant elimination. But practical TTK includes aim-down-sight (ADS) speed, chamber time between shots, and bolt-action cycling. Heavy snipers sacrifice fire rate for damage, meaning missed shots are punishing. Semi-auto marksman rifles offer faster follow-ups but generally can’t one-shot through three plates unless hitting upper chest or head with specific builds.
Best One Shot Snipers in Warzone Right Now
The sniper meta shifts with each major patch, but as of Season 2 Reloaded in 2026, several weapons consistently deliver one-shot eliminations. Here’s what’s dominating lobbies.
Top Heavy Sniper Rifles for Maximum Damage
FJX Imperium remains the gold standard for one-shot kills. With a headshot multiplier of 3.0x and base damage of 169, it reliably eliminates fully plated opponents out to 100+ meters. The bolt-action is slower than competitors, but the guaranteed kill on accurate shots makes it the choice for patient, positional players.
Key stats:
- Base damage: 169
- Headshot multiplier: 3.0x
- Effective one-shot range: 115m (with proper attachments)
- Bullet velocity: 1,100 m/s (optimized build)
MCPR-300 offers a slightly faster fire rate while maintaining one-shot potential. It’s more forgiving for players still developing their accuracy, with a generous headshot hitbox and minimal idle sway. Post-patch adjustments in Season 1 buffed its ADS speed by 8%, making it competitive for aggressive sniping.
Victus XMR stands out for extreme long-range engagements. While its ADS speed is the slowest in class, the weapon maintains one-shot kills past 150 meters, unmatched among current snipers. It’s the go-to for final circle mountain holds or cross-map eliminations in Al Mazrah’s open terrain.
Precision Marksman Rifles Worth Your Attention
Marksman rifles blur the line between snipers and battle rifles. While most can’t one-shot through three plates, several deserve consideration for specific playstyles.
SPR 208 with the .300 Norma ammunition conversion achieves one-shot headshot kills within 50 meters against full armor. Beyond that range, it drops to requiring head + upper chest shots. The semi-auto capability allows for rapid follow-ups, making it lethal in medium-range engagements where weapon consistency matters.
SA-B 50 technically qualifies as a marksman rifle but functions identically to heavy snipers. With a 2.8x headshot multiplier and 175 base damage, it achieves one-shots out to roughly 90 meters. The slightly faster ADS compared to the FJX makes it appealing for mobile snipers who reposition frequently.
Competitive players have been gravitating toward the FJX and MCPR-300 in recent tournaments. Data from professional configurations shows over 60% of top-tier snipers running one of these two weapons in Season 2.
Optimal Loadouts for One Shot Kills
Building a one-shot sniper loadout requires balancing damage range, ADS speed, and stability. Cookie-cutter builds rarely suit everyone, playstyle and engagement distances matter.
Attachment Combinations for Damage and Range
For the FJX Imperium (optimized for maximum one-shot range):
- Barrel: Fahrenheit 29″ barrel (+bullet velocity, +damage range)
- Optic: SP-X 80 6.6x (clean sight picture, minimal glint)
- Bolt: FSS OLE-V Laser (faster ADS, maintains one-shot capability)
- Stock: Cronen Lion Stock (+ADS speed, +aim walking movement)
- Ammunition: .408 Explosive (increased headshot damage at range)
This configuration pushes one-shot capability to 115 meters while keeping ADS under 650ms, critical for reactive plays when enemies push your position.
For the MCPR-300 (balanced for mid-long range):
- Barrel: 22″ OMX-456 barrel
- Optic: Forge Tac Delta 4 (4.0x magnification for versatility)
- Muzzle: Nilsound 90 (suppression without major velocity penalty)
- Stock: Ivanov Wood Stock (reduced idle sway)
- Rear Grip: Schlager Match Grip (flinch resistance)
This build sacrifices some bullet velocity for better handling and stealth. The suppressor keeps you off radar, essential when third-parties are scanning for sniper glint.
Perks and Equipment to Complement Your Sniper
Perk packages should enhance survivability and information gathering:
Base Perks:
- Overkill: Mandatory for carrying a meta SMG or AR alongside your sniper
- Double Time: Extended tactical sprint for repositioning between circles
Bonus Perk:
- Fast Hands: Swap weapons faster when enemies push your position
Ultimate Perk:
- High Alert or Ghost: High Alert warns of flanks while holding angles: Ghost keeps you hidden during rotations
Equipment:
- Lethal: Claymore or Proximity Mine (covers flanks while hardscoping)
- Tactical: Heartbeat Sensor (information tool for medium-range engagements) or Snapshot Grenade (confirms enemy positions before peeking)
Three armor plates are non-negotiable. Always carry a satchel and restock plates between engagements. Dead silence as field upgrade gives you silent rotations when moving to new sniper nests.
Secondary Weapon Pairings
Your secondary covers close-range vulnerabilities. Current top pairings:
Lachmann Sub (MP5): Dominant SMG with 550ms TTK within 15 meters. Hipfire build works perfectly for panic situations when enemies breach your position.
ISO Hemlock: Burst-fire AR excels at 20-40 meters, the awkward range where snipers struggle but SMGs lose effectiveness. Two-burst kills against damaged opponents.
Vaznev-9K: Highest mobility SMG, allowing rapid escapes after taking shots. Slightly longer TTK than Lachmann but the movement speed difference saves lives in bad positioning.
Avoid running two long-range weapons. Players running sniper + battle rifle lack tools for close-quarters and get shredded by aggressive teams.
Positioning and Map Awareness for Sniper Success
Perfect aim means nothing without smart positioning. Warzone’s battle royale format punishes static players, so balancing strong angles with rotation options is essential.
High Ground and Power Positions
High ground remains the fundamental rule of sniping. Elevation provides several advantages:
- Wider sight lines over cover
- Easier headshot angles on enemies in low cover
- Harder for opponents to return accurate fire
- Better information on zone rotations and team movements
In Urzikstan, the Shahin Manor rooftops and Zarqwa Hydroelectric towers offer commanding views over high-traffic areas. In Al Mazrah’s Rohan Oil, the central drilling platform dominates sightlines across multiple POIs.
But never commit to a position without escape routes. The best sniper nests have:
- Two or more exit paths
- Access to vertical cover (stairs, ledges for quick drops)
- Proximity to vehicles or zip lines for emergency rotations
- Natural cover from third-party angles
Avoid rooftops with single-ladder access. Getting pushed by a coordinated squad with no escape is a death sentence regardless of sniper skill.
Rotations and Zone Management
Circle positioning separates good snipers from great ones. Early-game, prioritize buildings or terrain features near zone center. This minimizes forced rotations during mid-game when teams converge.
When the circle shifts against you:
- Identify rotation timing: Move during natural lulls in combat, not during peak firefights when third-parties are watching
- Use terrain and buildings: Rotate along ridgelines or through structures rather than sprinting across open ground
- Pre-position for final circles: In circles 4-5, prioritize natural cover (rocks, hills) over buildings that get focused by multiple teams
Many squads playing in organized formats scout power positions early and contest them before zone closure. Solo snipers should avoid contested areas unless confident in winning early fights.
Techniques to Improve Your One Shot Accuracy
Landing consistent headshots requires understanding bullet physics and deliberate practice. Even the best loadout can’t compensate for poor fundamentals.
Bullet Drop and Travel Time Mastery
Warzone snipers are projectile weapons, not hitscan. Bullet drop increases with distance, requiring aim adjustments above the target’s head. Each rifle has unique ballistics:
- FJX Imperium: Minimal drop out to 100m: hold approximately one mil-dot high at 150m
- MCPR-300: Slightly more pronounced drop: requires two mil-dots compensation at 175m
- Victus XMR: Flattest trajectory of heavy snipers: one mil-dot holds work past 200m with proper barrel
Bullet velocity determines travel time. The FJX with proper attachments hits 1,100 m/s, meaning roughly 0.15 seconds to reach a target at 165 meters. That delay means stationary targets are easy, but moving enemies require lead.
Practice bullet drop in custom matches or Plunder mode. Pick distant landmarks and fire at various ranges, noting exactly where bullets land relative to your reticle. Muscle memory develops faster with repetitive practice than random engagements.
Leading Moving Targets
Leading means aiming ahead of moving targets so the bullet and enemy intersect. The required lead depends on:
- Target’s movement speed (sprinting vs walking)
- Direction of travel relative to your position
- Distance to target
- Your weapon’s bullet velocity
At 100 meters against a sprinting target moving perpendicular to your line of sight, lead approximately one full body width with the FJX Imperium. Double that for 200 meters. Targets running toward or away from you require minimal lead, focus on vertical aim.
The hardest scenario is diagonal movement combined with jumping or sliding. These demand prediction of momentum shifts. Watch for patterns, most players slide at predictable moments or jump when approaching cover.
Pro players often track targets for 1-2 seconds before firing, syncing their crosshair movement with the enemy’s speed. This “follow-through” technique reduces required adjustments at the moment of firing.
Sensitivity and Aim Training Tips
Sensitivity settings are personal, but general guidelines help:
Controller players:
- ADS sensitivity: 0.75-1.0 (lower for precision, higher for tracking fast targets)
- Sensitivity multiplier (high zoom): 0.80-0.90 (reduces overshoot on long-range shots)
- Dynamic aim response curve: Linear or precision (avoid standard, too much acceleration)
Mouse and keyboard:
- 400-800 DPI with 4-8 in-game sensitivity
- Scoped sensitivity multiplier: 0.80-1.0
- Disable mouse acceleration
Consistent improvement comes from aim training routines. Dedicate 15-20 minutes before Warzone sessions to exercises focusing on:
- Flicking to distant targets (builds muscle memory for initial aim)
- Tracking moving dots or bots at various speeds
- Precision drills requiring headshots on small targets
In-game, analyze your deaths. If you consistently miss left or right, your lead estimation needs work. Missing high or low indicates bullet drop miscalculation. Track these patterns and adjust accordingly.
Common Mistakes to Avoid When Sniping
Even experienced players fall into bad habits that tank their sniper effectiveness. Here are the most frequent errors and how to correct them.
Staying in one position too long: The sniper glint gives away your location after the first shot. Competent teams immediately push or counter-snipe. After securing a kill (or missing 2-3 shots), relocate 20-30 meters to a different angle. Static snipers are easy eliminations.
Over-committing to kills: You crack an enemy’s armor and they duck behind cover. The temptation to hold that angle, waiting for them to peek, is strong. But while you’re tunnel-visioned on one player, their teammates flank or a third-party pushes. Recognize when to disengage and reset.
Poor ammo management: Heavy sniper rifles carry limited ammo, typically 15-20 rounds without munitions box. Spamming shots at distant, low-percentage targets burns through reserves. Be selective. Each shot should have genuine elimination potential.
Ignoring close-range threats: Focusing downrange through your optic while enemies push from flanks is a death sentence. Use audio cues (footsteps, vehicle sounds) and periodically check your six. Place claymores or proximity mines covering approach angles.
Fighting losing positions: If another sniper has better angle or elevation on you, repositioning is smarter than trading shots. Winning a sniper duel from disadvantage requires them to miss while you land a headshot, bad odds.
Scoping in predictable patterns: Peeking the same corner or window repeatedly creates timing opportunities for enemy snipers. Vary your peek locations by a meter or two, and change your timing, sometimes peek immediately, other times wait 5 seconds.
Neglecting loadout flexibility: Running a heavy sniper works in open terrain, but in urban final circles with sub-50 meter engagements, that bolt-action becomes a liability. Have a secondary loadout with a marksman rifle or AR for close-quarters circles.
Counter-Sniping Strategies and Staying Alive
Knowing how to fight enemy snipers is as important as landing your own shots. Counter-sniping requires different tactics than standard engagements.
Identifying sniper positions: Watch for glint, the telltale lens reflection from scoped snipers. It appears as a bright flash at long range. Note the location immediately and mark it for your team. Even if you can’t return fire effectively, knowing where threats exist prevents careless peeks.
Using cover intelligently: Never stand still in the open, even while looting or plating. Constant micro-movements (strafing, crouching, jumping) make headshots significantly harder. When moving between cover points, sprint in unpredictable patterns, straight lines are easy to lead.
Smoke grenades are underutilized against snipers. A well-placed smoke blocks their sightline for 8-10 seconds, enough time to reposition or revive teammates. Carry at least one smoke in sniper-heavy lobbies.
Pushing enemy snipers: If you have positioning or number advantage, aggressive pushes work. Snipers excel at range but struggle in close quarters. Coordinate with teammates, one provides suppressing fire (doesn’t need to hit, just forces them off angles) while others close distance using cover. Most snipers panic and switch to secondary weapons when rushed, creating vulnerable moments.
Counter-sniping techniques: If you’re also running a sniper and spot enemy glint:
- Don’t peek predictably: They’re likely already aimed at your last known position
- Use off-angles: Peek from unexpected positions, different windows, prone positions, or angles they can’t pre-aim
- Bait shots: Quick peek to draw their shot, then re-peek during their bolt-action cycle (approximately 1.2-1.5 seconds)
- Coordinate timing: If multiple teammates have snipers, peek simultaneously from different angles, they can only aim at one person
Armor and health management: Always maintain full plates when in sniper sightlines. The difference between 200 health (two plates) and 250 health (three plates) is life or death against one-shot capable weapons. Prioritize plating over looting when crossing danger zones.
Vehicle usage: Vehicles provide mobile cover but are double-edged. Experienced snipers lead vehicle movements and secure easy headshots on drivers. If using vehicles in sniper territory, have passengers exit early and flank on foot while the driver draws attention and circles.
Conclusion
Mastering one-shot snipers in Warzone combines mechanical skill with tactical intelligence. The FJX Imperium and MCPR-300 remain top choices for consistent eliminations, but weapons alone won’t carry you. Optimized attachments that balance damage range with ADS speed, perks that cover your weaknesses, and secondaries that handle close engagements all matter.
Positioning dictates more outcomes than raw aim. High ground, escape routes, and smart rotations keep you alive long enough to impact matches. Understanding bullet drop, leading targets, and maintaining appropriate sensitivity settings develop through dedicated practice, there’s no shortcut.
Avoid the common pitfalls: staying too long in one spot, over-committing to kills, and fighting from bad positions. When facing enemy snipers, use smoke, unpredictable movement, and coordinated pushes rather than trading shots from disadvantage.
The sniper meta will continue evolving with future patches and seasons, but the fundamentals remain constant. Put in the practice, refine your loadouts, and those one-tap eliminations will become consistent rather than lucky. Your kill feed awaits.